A falling kWh figure does not identify the fault: cloudy weather, soiling, a weak string, inverter derating, export control, and grid trips create different symptoms. You will be able to separate weather loss from equipment failure, isolate the affected circuit, inspect the roof safely, and verify that repairs restore useful energy rather than only clearing an alarm.
Key takeaways
- Use performance ratio and plane-of-array irradiance, not raw kilowatt-hours.
- Separate module, inverter, transformer, grid, and export-meter losses before repairing.
- Check Coimbatore roofs for dust, bird droppings, shade, corrosion, and drainage defects.
- Prove recovery with post-repair PR, string currents, alarms, and export-meter readings.
Confirm Whether the Plant Is Truly Underperforming
If you are investigating industrial rooftop solar plant low output in Coimbatore, use performance ratio (PR), not raw kilowatt-hours. PR compares delivered energy with plane-of-array irradiance, so it remains useful across cloudy days, seasons, and different operating periods; IEC 61724-1 defines the monitoring terminology.
Before calling the plant abnormal, check these comparisons:
- Compare PR for the same operating hours over several clear-sky days, not one rainy or hazy day.
- Validate the plane-of-array irradiance sensor against a clean reference instrument; a dirty or misaligned sensor can falsely create a fault.
- Compare module backsheet temperature with the manufacturer’s power temperature coefficient. High cell temperature reduces output, but ambient temperature alone cannot prove overheating.
- Check whether midday output is clipped at the inverter’s AC rating, restricted by an export cap, or reduced by grid voltage or frequency trips.
- Review inverter event logs and meter timestamps so a short curtailment is not mistaken for a full-day production loss.
A stable PR decline across comparable irradiance conditions indicates a plant problem. If PR falls only during high heat, haze, rain residue, or changing shade, investigate those conditions first.
For a suspected equipment fault, take an IV-curve trace under stable irradiance and temperature, compare it with an expected or reference curve, and correct the trace for field conditions. Uniformly low current suggests irradiance or soiling; distorted curves point toward resistance, mismatch, bypass-diode, or open-circuit problems.
Separate DC Generation Problems from AC and Grid Losses
Start with the same 15-minute interval across the irradiance sensor, plane-of-array irradiance, inverter DC power, inverter AC power, export meter, and event log. This sequence suits industrial solar plant troubleshooting in coimbatore because it separates generation loss from export loss before anyone replaces equipment.
1. Confirm the reference. Compare PR, not raw kWh, with a clear-sky interval or comparable operating day. A bad irradiance sensor can falsely label a healthy plant as underperforming.
2. Compare DC input with AC output. Low DC and low AC directs you to string currents, fuses, connectors, cables, modules, soiling, or shading. High DC with low AC directs you to inverter faults, derating, grid limits, or export controls.
3. Read the inverter event log for overtemperature, insulation resistance, ground fault, DC overvoltage, AC overvoltage, frequency trips, and power-limit commands. Check AC-limit and active-power-control settings before testing modules.
4. Measure string currents under stable irradiance and compare matching strings on the same MPPT. One weak string warrants fuse, connector, cable, and insulation checks; several weak strings suggest shading, soiling, or a control issue.
5. Test the suspect string with an IV-curve tracer, correcting for irradiance and module temperature. A series-resistance, shunt, mismatch, bypass-diode, or open-circuit signature is stronger evidence than a visual guess.
6. If DC remains healthy, inspect the export meter timestamps, plant controller, zero-export or maximum-demand settings, transformer status, and grid-trip history. A utility voltage or frequency limit can reduce exported energy without reducing solar generation.
Inspect Coimbatore-Specific Soiling, Shading, and Roof Defects
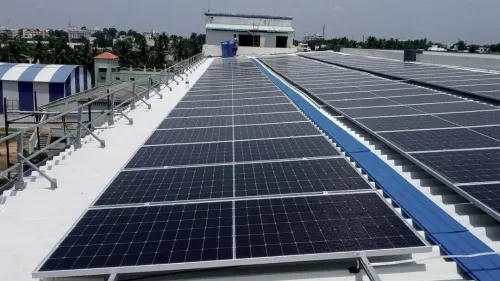
Coimbatore’s dust, monsoon residue, bird droppings, humidity, and industrial or salt-laden deposits can reduce irradiance before any component fails. Check the plane of array, not only the module glass: compare a clean module with a dirty one, inspect junction boxes and connectors for corrosion or water tracking, and check drains after rain.
Use a fall-protected walkway and never step on modules, cable trays, or fragile roof sheets. Before opening equipment, isolate and lock out AC and DC sources, then verify absence of voltage with rated instruments; modules remain live in daylight.
- Photograph shadows at morning, noon, and afternoon. Record water tanks, exhaust stacks, parapets, lightning conductors, new factory structures, and temporary materials; partial shade on one cell area can create mismatch, hotspot risk, and bypass-diode operation.
- Check mounting rails, clamps, ballast, fasteners, cable clips, and earthing bonds for movement, corrosion, sharp edges, or cables touching the roof. Do not drill, drag tools, or disturb waterproofing; report cracked sealant, exposed penetrations, ponding, and blocked drainage.
- Clean only with the approved method and cool water; avoid abrasive pads and high-pressure jets aimed at seals or connectors. Compare string currents, then use an IV-curve trace under stable irradiance and temperature, corrected against a reference curve.
| Condition | What it indicates | Safe inspection |
|---|---|---|
| Uniform dull glass | Soiling loss | Visual comparison and irradiance check |
| One shaded section | Obstruction or mismatch | Shadow photographs; no module contact |
| Low string current | Fuse, connector, cable, or module fault | Isolate, inspect, and test the string |
| Wet enclosure or gland | Humidity ingress | External inspection before opening |
Treat rooftop solar maintenance in Coimbatore as both an energy inspection and a waterproofing inspection.
Use Electrical and Thermal Tests to Locate the Failed Component
A thermal hotspot identifies where to investigate, not which part to replace. Scan under adequate irradiance and load, record wind and operating conditions, then confirm the point electrically.
Compare strings on the same MPPT at similar irradiance and module temperature; a low-current string deserves testing, while an open string can show normal voltage and zero current.
| Component | Confirming measurements | What the result means |
|---|---|---|
| Failed fuse | Continuity and voltage drop across the fuse or holder under load | Open fuse or excessive holder drop isolates the string; replace the fuse only after checking for a downstream short |
| Loose connector | Infrared hotspot plus millivolt drop across the mated connector under load | High resistance is confirmed; remake or replace the connector |
| Damaged cable | Voltage drop along the cable, conductor continuity, and insulation resistance to earth | High resistance or low insulation identifies the cable section |
| Module fault | IV-curve trace, module current and voltage, and localized hotspot | A kink, low fill factor, or abnormal temperature confirms degradation; correct the curve for irradiance and temperature |
| Bypass diode | Diode forward/reverse test when isolated, plus an IV-curve step or hotspot | A shorted diode lowers voltage; an open diode raises hotspot risk |
| Inverter fault | DC input versus AC output, MPPT currents, event log, AC voltage and frequency | DC present with missing or derated AC output points to the inverter or grid limit |
| Transformer fault | Phase voltage and current balance, winding resistance, temperature, and insulation resistance | Imbalance, overheating, or abnormal resistance warrants transformer testing |
| Insulation circuit | Insulation-resistance test from isolated DC circuits to earth and leakage-current readings | Low resistance confirms a wet, tracked, or damaged circuit |
After rain, inspect junction boxes, glands, rooftop boxes, filters, and drainage before resetting an earth-fault alarm. Trace and isolate the wet circuit first. An IV trace under stable conditions prevents module replacement when soiling, shading, mismatch, or curtailment causes the loss.
Repair in Loss-and-Risk Order, Then Prove Output Has Returned
Choose the repair by recoverable energy and hazard, not by the most visibly damaged part. For factory solar plant repair in coimbatore, quantify the lost kW, expected downtime, safety exposure, and repeat risk before approving work.
- Restore the largest immediate loss: reconnect a failed string, replace a confirmed failed inverter, correct an unsafe hot termination, or remove an export-control limit. Check the inverter event log and export meter before replacing modules; curtailment or inverter downtime can outweigh years of module degradation.
- Correct recurring losses next: clean confirmed soiling, remove new shadows from tanks, exhaust stacks, parapets, lightning conductors, or temporary factory structures, and fix mismatch only after string-current and IV-curve evidence identifies it.
- Replace a module last, after thermal imaging, IV testing, and visual inspection confirm hotspot damage, bypass-diode failure, PID, or measured degradation.
- Before opening DC or AC equipment, isolate every relevant source, lock it out, and verify absence of voltage with correctly rated instruments. Treat daylight PV modules as live; preserve protective bonding, cable segregation, enclosure ratings, and surge-protection coordination.
Orbit Solar India Pvt Ltd can use the same evidence-based sequence during factory work, where roof access, production schedules, and electrical isolation must be coordinated.
After repair, clear alarms, inspect terminations, measure string currents, and confirm inverter AC output and export-meter readings. Compare performance ratio under stable irradiance with a comparable clear-sky period using IEC 61724-1 terminology. A normal PR, balanced strings, no abnormal thermal signature, and sustained output—not one good reading—prove recovery.
Related product
 | Industrial Rooftop Solar Power Plant Industrial Rooftop Solar Power Plant (RCC ROOF SHEETS ROOFTOP) Industrial rooftop solar plants, installed on factory and warehouse RCC or metal sheet roofs, convert sunlight into electricity, significantly... View product → |
Frequently asked questions
How do you confirm that an industrial rooftop solar plant is underperforming?
Compare performance ratio with plane-of-array irradiance, operating availability, expected energy, inverter data, and export-meter readings. Raw kilowatt-hours alone cannot distinguish weather from plant losses.
How can you separate DC generation problems from AC and grid losses?
Compare irradiance, inverter DC input, inverter AC output, transformer output, protection-device status, and the utility export meter. A drop before the inverter indicates a DC issue; a drop after it indicates AC, grid, or metering losses.
What should you inspect on a Coimbatore industrial rooftop?
Inspect module surfaces for dust and bird droppings, nearby structures for shade, roof drains and waterproofing, mounting fasteners, cable routes, connectors, and corrosion caused by moisture or chemical exposure.
Which tests locate a failed solar component?
Use inverter alarm logs, string-current comparisons, insulation-resistance testing, I-V curve tracing, connector and fuse checks, and thermal imaging. De-energise equipment and use qualified personnel for live electrical tests.
How do you prove that factory solar plant repairs restored output?
Record the repaired component, compare post-repair PR with comparable irradiance periods, confirm string currents and inverter availability, and reconcile inverter production with the export meter.
Keywords